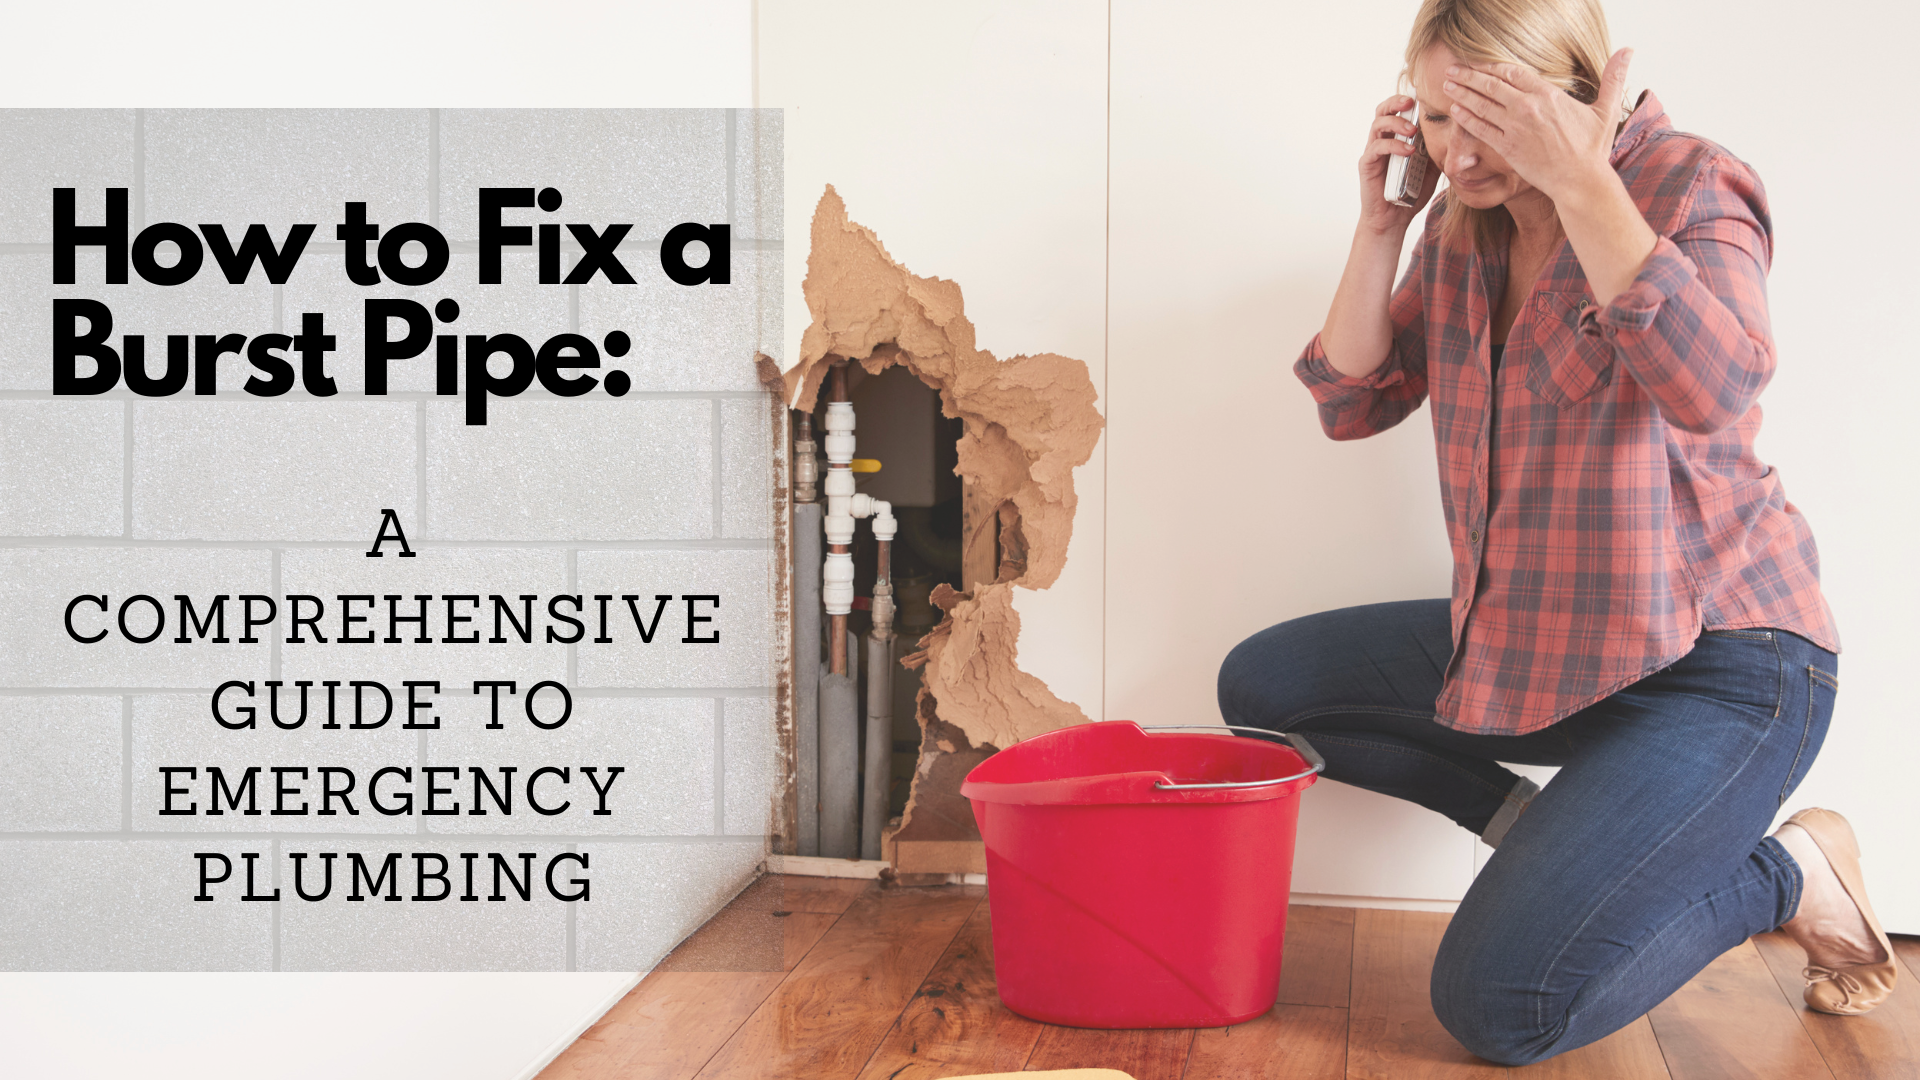
 To repair water-damaged ceilings is essential, especially since no one wants to deal with the discomfort of having their property impaired. Ceilings, in particular, can be an eyesore and pose a serious threat to the structural quality of your home if not promptly addressed. Failure to address water damage can result in mold growth and spread, which can cause health issues and cost a considerable amount of money to repair. As a homeowner, it’s crucial to recognize the signs and causes of water-damaged ceilings to take immediate action and prevent further damage.
What are the Signs of a Water-Damaged Ceiling?
Before you think to repair water-damaged ceilings, it is important that you are aware first of its signs. Water exposure is the common reason for most types of ceiling damage. Here are the following signs:
-
Ceiling Cracks
You may see these cracks either in a straight line or a spiderweb pattern. Cracks in the ceiling can be an indicator that your top is suffering from water damage.
-
Peeling Paint
Water becomes damaging once it starts flowing through delicate materials. It can cause the ceiling paint to peel, flake, and crack. Also, you may observe that the trim and baseboards are beginning to split from your ceilings or walls.
-
Water Stains on the Ceiling
One of the most identified signs of water-damaged ceilings is water stains. The stains generally appear rusty, yellowish, or dark and damp. You may observe that your ceiling seems to be sweating.
-
Swelling or Sagging
Even a minor water leak can cause your ceiling to swell or sag if left untreated.
-
Mold Germination
Mold growth frequently appears after a water damage incident, primarily if improperly dealt with. If the room is highly humid, you may notice mold issues in your ceiling or wall corners.
Know the Causes of a Water-Damaged Ceiling
The following are the most causes of water damage to ceilings:
- Excessive Moisture
- Deterioration in the Home Structure
- Roof and Plumbing Leaks
- Old Home
- Clogged Gutters, Ice Dams, or a Burst Pipe
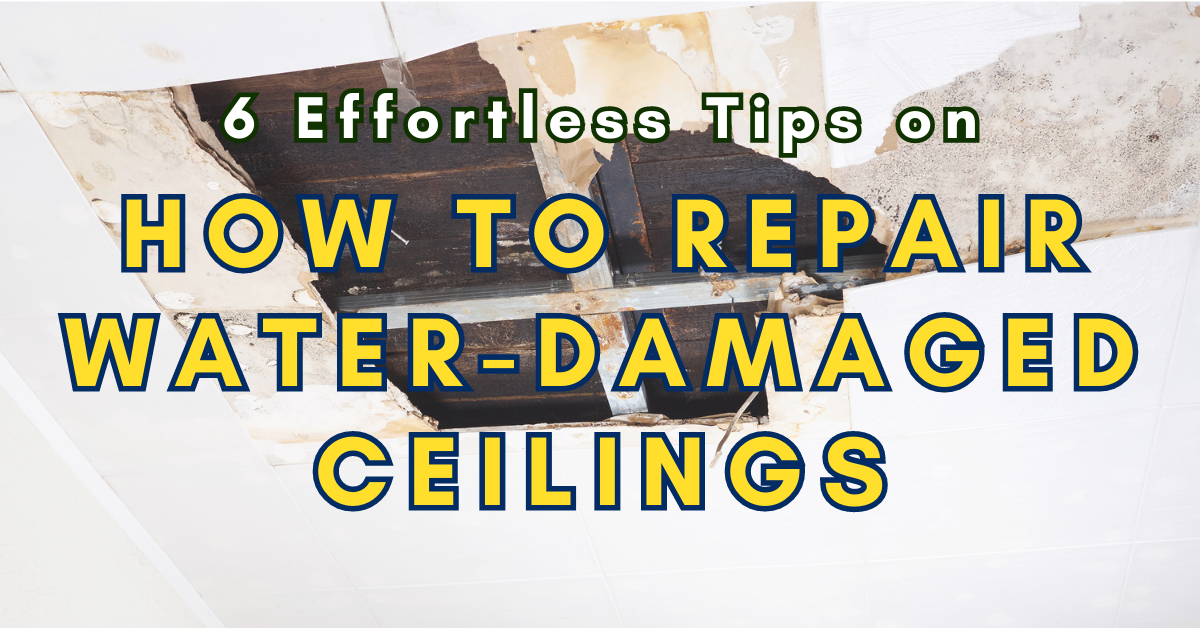
How To Repair Water-Damaged Ceilings
You may follow the given guide below to repair water-damaged ceilings.
-
Pull Out Your Items.
The first thing you can do to repair water-damaged ceilings is through pulling out of your items. Take your hard and fabric objects away from damp areas. Then, place some rags or towels on your flooring to sponge up as much of the fluid as possible. You may also want to get some buckets or containers for catching waterdrops from the ceiling.
-
Determine the Source of Water Damage.
Locate where the water damage has begun. In order to repair water-damaged ceilings, you may check the following common areas in your home:
- A broken pipe or weak plumbing connections can create water damage.
- Go up to the attic and inspect if there are cracks or holes in your roof. Roof leakage can cause water-damaged ceilings.
- Any impairment to exterior walls allows water to pass into the ceiling and wall cavities. So, try to discover where the damage has started.
- Inspect for leaks around your water heater, washing machine, dishwasher, and other appliances in the bathroom and laundry areas.
-
Minimize the Damage.
Minimize further damage once you determine the source of the leak. Do it by shutting the main water and securing hose connections. Then dry the affected sites thoroughly before you repair water-damaged ceilings.
Do not forget to clean the area with DIY cleansing solutions or bleach to inhibit mold growth.
-
Repair the Water Damage Source.
Once you find the source of the issue, fix it immediately. Otherwise, you will end up with more water damage problems in the future. You may have to contact a specialist if the leak source is a burst pipe while you repair water-damaged ceilings.
-
Pull out the Damaged Ceiling and Start the Repair Task.
After fixing the source of water damage, you may start taking out and replacing damaged drywall or ceiling materials. However, protect yourself first by wearing safety goggles and a dust mask.
The drywall easily crumbles as you try to remove it. You may want to place drop cloths or tarps on the floor to catch all the dust and debris from it.
You can cut out the water-stained part of the ceiling and replace it with a new ceiling material. But if the damaged area is 12 square inches or over, consider replacing the entire ceiling panel.
When the damaged ceiling is changed, take the rough sections off using sandpaper. Then fill the small holes with joint compound using a putty knife, let it dry, and smooth it down again with more sandpaper.
Dry the affected areas thoroughly to prevent future mold issues that might require you to seek help from a professional.
-
Prime and Paint the Ceiling.
After you repair water-damaged ceilings, the next step you can do is priming and painting. But first, open your windows for a well-ventilated room. Coat your entire ceiling with a primer and let it dry. Then, repaint it uniformly.
For Water Damage Restoration Services, Call Superior Restoration Riverside
Any water damage issues can lead to severe house problems if not immediately treated. So, if you find yourself having a complicated time while you repair water-damaged ceilings, seek assistance from a water damage restoration company.
Superior Restoration has a highly skilled team of specialists who are always ready to help you deal with any water damage and mold problems – from minor to severe ones.
We are available even in emergencies, 24/7. Call us today for inquiries about water damage restoration and mold remediation services.